2.7 Postpaid bar orders
Article goal
To teach the administrator how to work with postpaid orders when a client pays for items after receiving them.
What you will learn
- How to create a postpaid order
- How to change the order contents before payment
- How to complete or cancel an order
When to use postpayment
Situations where this feature is useful:
- The client forgot their money — they can pay later during the shift
- Corporate clients — payment under a contract at the end of the month
- Technical issues — the terminal or online payments are not working
- Trusted regular clients — to strengthen loyalty
Step-by-step instructions
Step 1. Creating a postpaid order
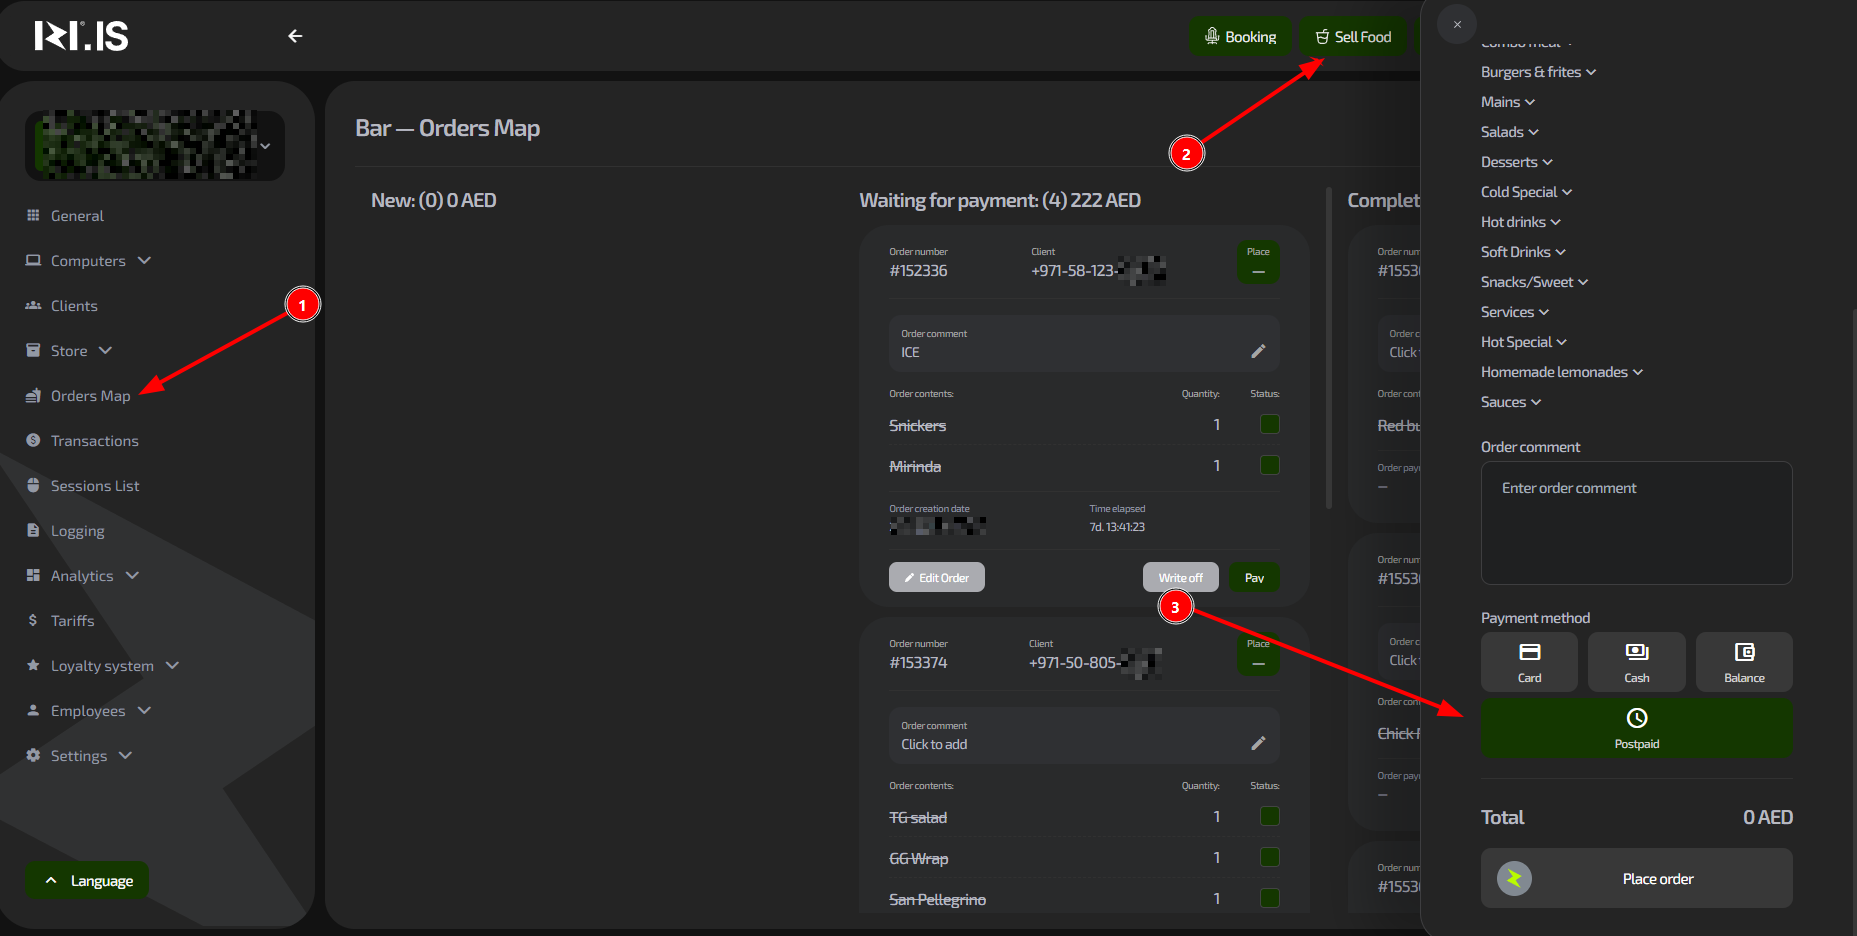
- When creating an order, select “Postpayment”
- The order will appear with the status “New”
Result: The order is created, but payment is postponed.
Step 2. Giving items to the client
- After giving the items to the client, tick the “Status” checkbox
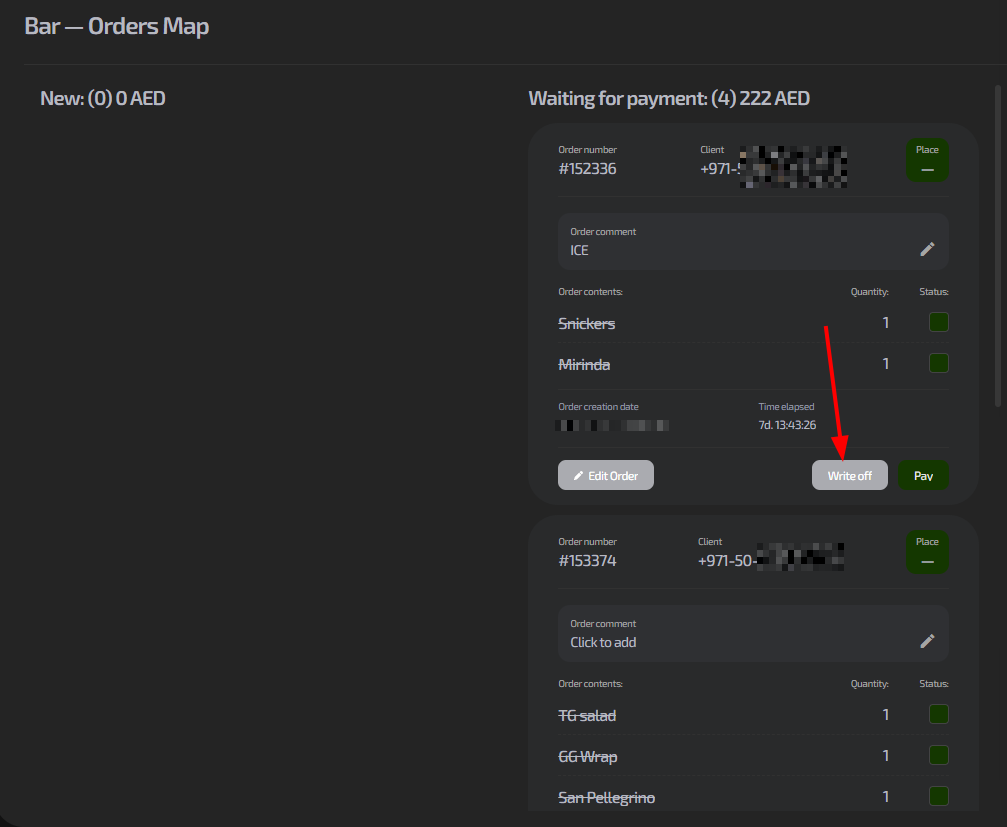
- The order changes to the “Awaiting payment” status
Step 3. Paying for or editing the order
- To pay — click “Checkout order” and process the payment
- To change the order contents — use “Edit”
- To cancel — click “Write-off”
Typical situations
| Problem | Solution |
|---|---|
| The client changed their mind | Click “Write-off” to cancel the order |
| You need to add items to the order | Use “Edit” before payment |
| The client paid partially | Take the full payment, partial payment is not supported |
| The order is missing from the report | Check the status — it must be “Completed” |