2.6 Working with the Order Map
Article goal
Show how to use the Order Map to effectively manage bar orders. You will learn to track statuses, control issuing of items and close payments on time, which prevents revenue loss and improves guest service.
Who is this article for
Administrators, bartenders, managers.
What you will learn
- Which statuses orders can have and how to work with them
- How to track the time since the order was created
- Why it is important to change item statuses in time
- How to edit orders and perform refunds
Step-by-step instructions
Step 1. Understand what the Order Map is and which orders are shown there
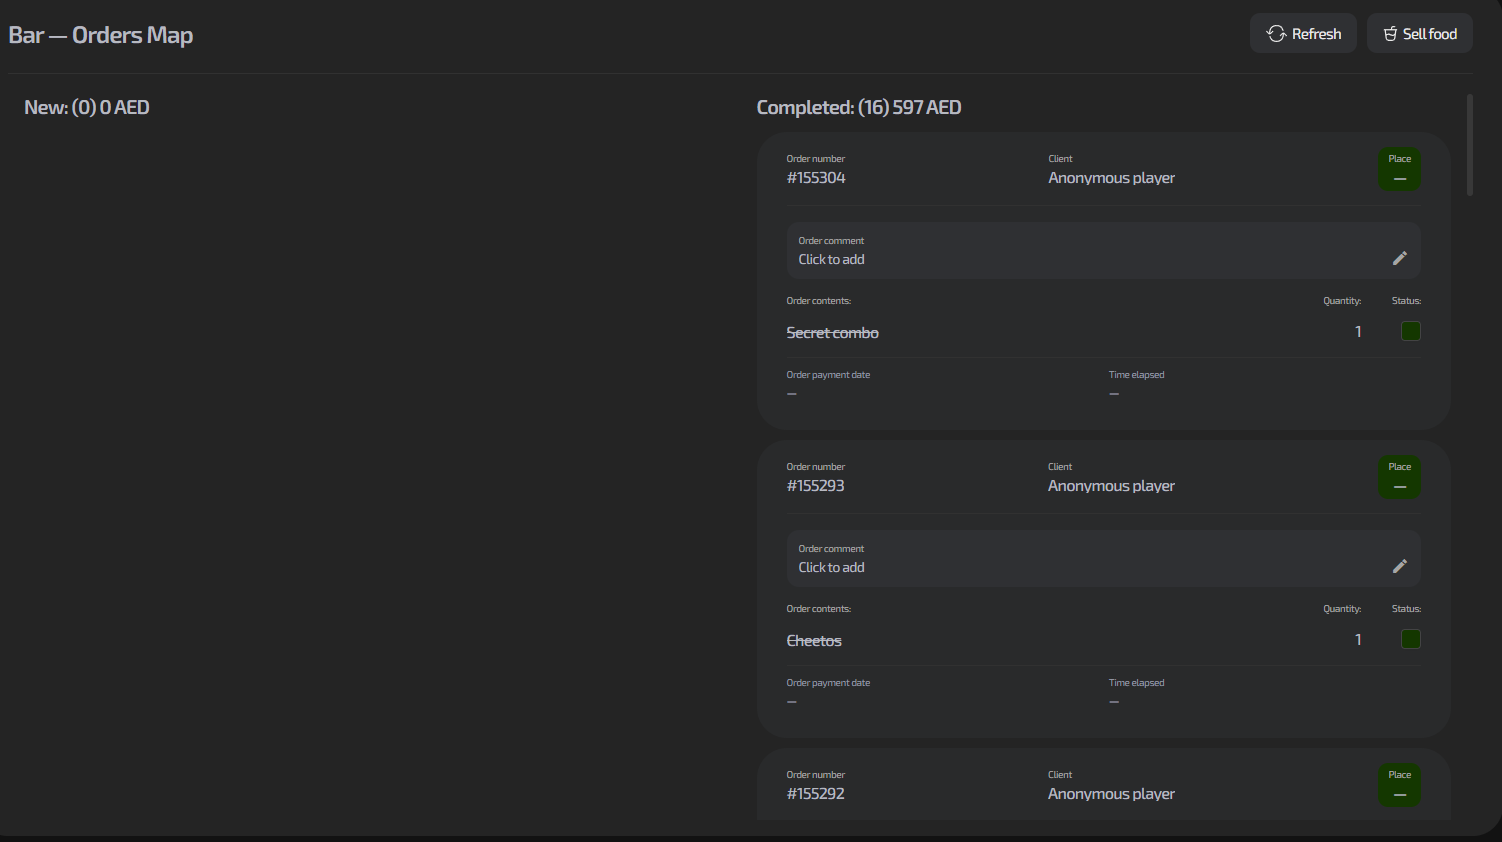
- The Order Map is a single control center for all bar orders
- Why do you need it? You see all orders in real time: from creation to issuing and payment. This helps:
- Not to lose orders during rush hours
- Control issuing of items from the stock
- Monitor postpaid orders and reduce non-payment risks
Orders come from three sources:
- IZI.Play mobile app
- Widget on the gaming PC (from a client with an active session)
- Directly from the administrator (the “Sell food” button)
Step 2. Understand order statuses

Each order has one of three statuses:
- New — the order is created but items have not yet been issued. Usually these are postpaid orders.
- Awaiting payment — items have been issued to the client, but payment has not yet been made.
- Completed — items have been issued and paid for.
Why is this important? Correct status changes help:
- The barista see which orders to prepare first
- The cashier understand which orders are waiting for payment
- The manager track whether order issuing is delayed
Step 3. Work with active orders
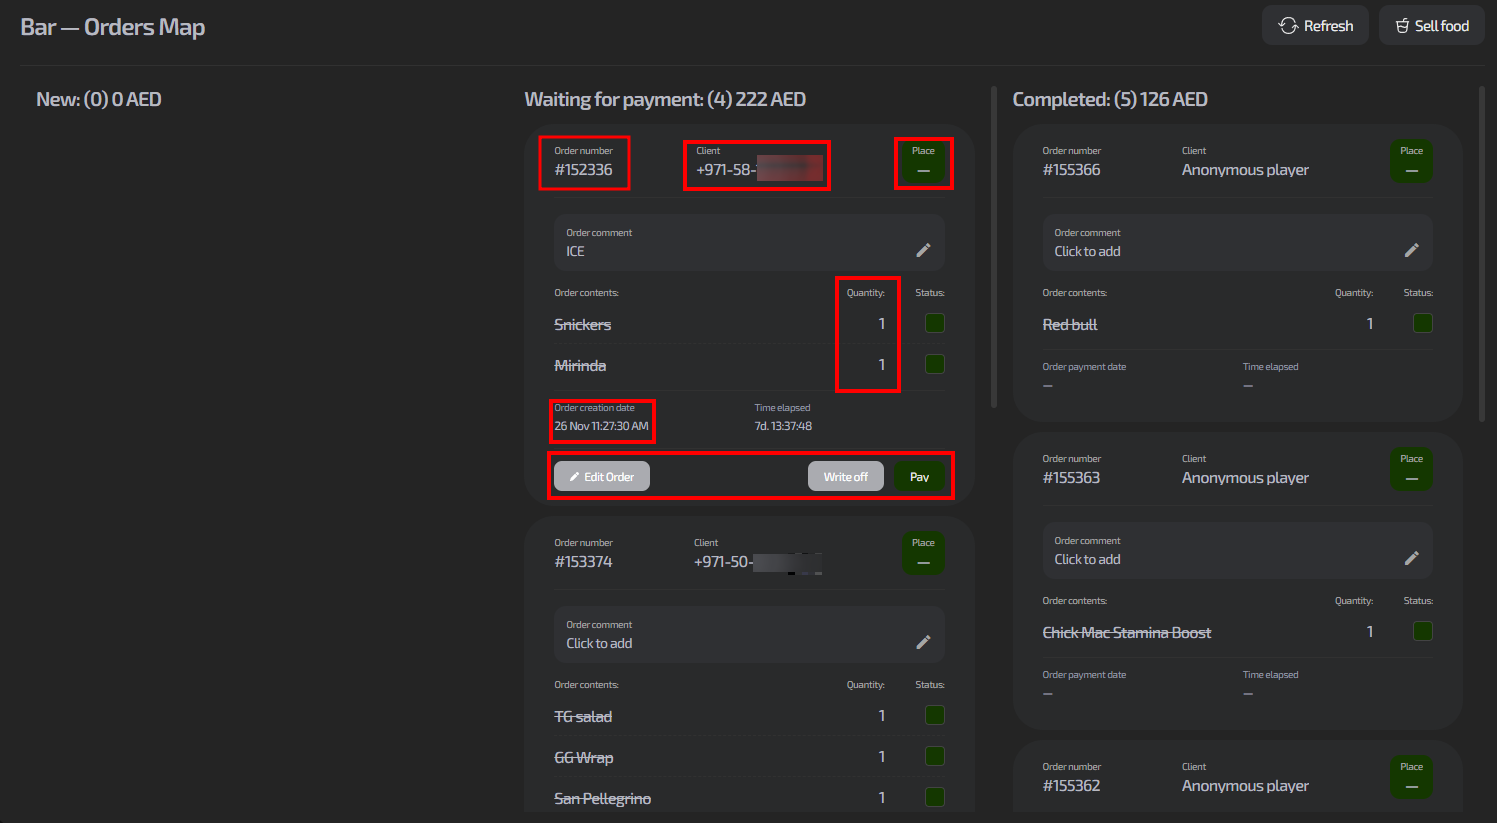
In the order card you can see:
- Order number and client phone
- Seat (if the order is from an active session)
- Order items with quantities
- Time since creation
- Control buttons
Postpayment workflow:
- Order created → status “New”
- Items issued → tick the checkboxes next to the issued items
- Status changes to “Awaiting payment”
- Take the payment → click “Pay”
- Order is finished → status “Completed”
Step 4. Use additional options
- Editing — you can change the order content if the client changes their mind
- Write-off — cancel the order if the item cannot be fulfilled
- Comments — special preparation notes
Typical situations
| Problem | Solution |
|---|---|
| The client says they paid in the app, but the order is still "New" | Check the transaction history. If the payment went through, change the order status to "Completed" manually |
| An item is out of stock after the order was created | Edit the order via the "Edit" button or perform a "Write-off" with a comment |
| The client wants to add items to an existing order | Create a new order for the same client — they will be shown together in the history |
| The order is not shown in the Order Map | Refresh the page. Check whether any filters are applied. If the issue repeats, contact support |
| You need to cancel a paid order | Issue a refund in the corresponding section |