3.6.7 Receiving items
Article goal
Show how a club administrator can receive items to the store balance via the admin panel: from selecting an existing item to creating a new one and confirming the receipt.
Who this article is for
- Club administrator
- Users with access rights to the “Store” section in the admin panel
What you will learn
- How to receive an existing item to the store
- How to create a new item if it is not in the list
- How to filter items by category for convenience
- What to do if an item is not displayed or parameters are filled in incorrectly
Prerequisites
Before you start, make sure that:
- You have an administrator account with access to item creation and receiving functionality
- Item categories are created in advance in the “Items list” subsection
- Access to the admin panel is available
Step-by-step guide
Step 1. Go to the “Receiving items” section
- Log in to the admin panel.
- Go to “Store” → “Receiving items”.
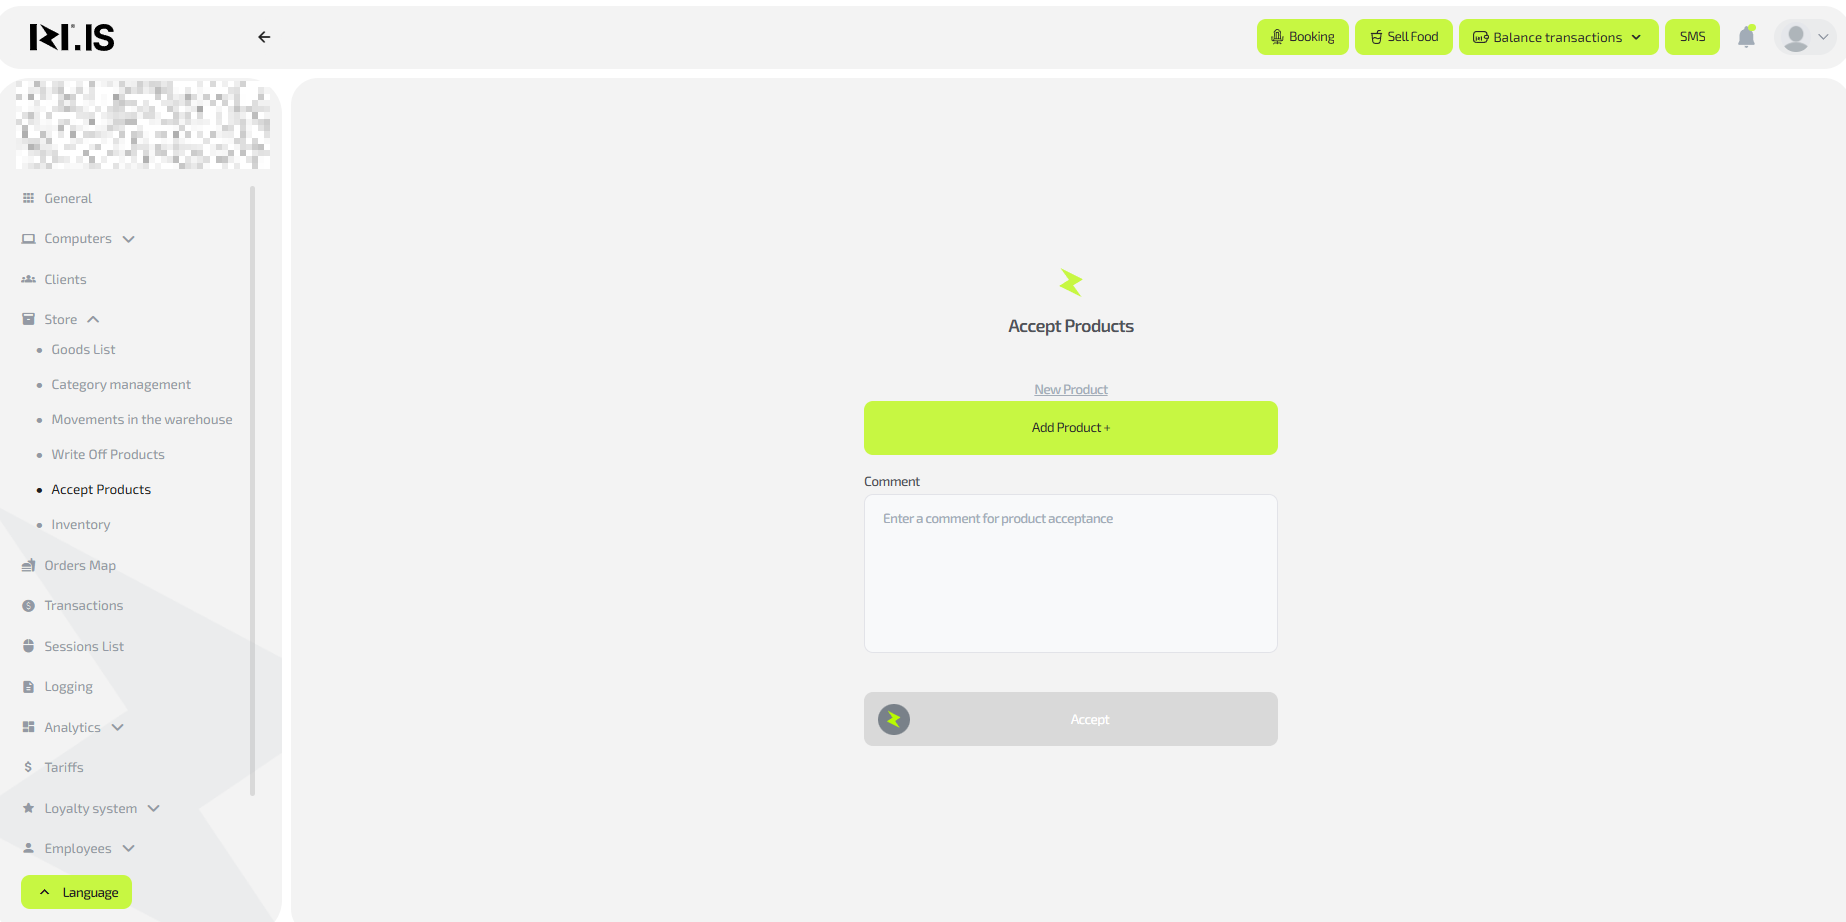
Step 2. Receive an existing item
- Click the “Add product+” button.
- In the window that opens, select items from the list and specify their quantity.
- For convenience, filter items by category (categories must be created in “Items list” beforehand).
- Click “Select items” to confirm the selection.
- Click “Receive”.
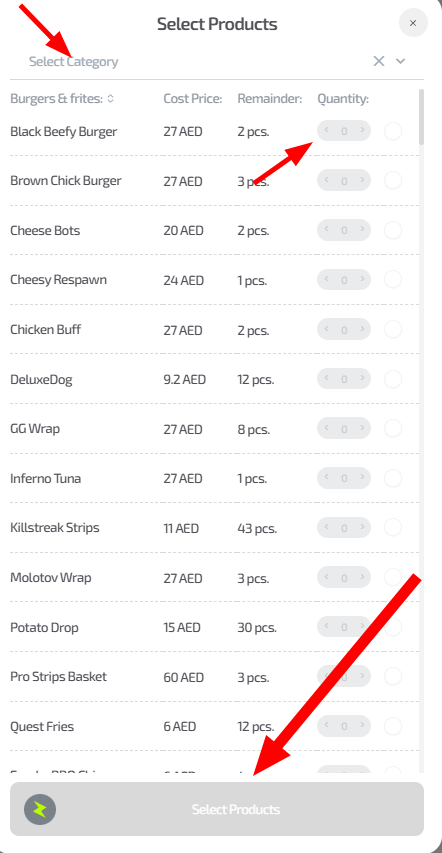
Tip: If the items list is empty, first create categories and items in the “Items list” subsection.
Step 3. Create a new item if needed
Above the “Add product+” button, click “New item”.
-
In the window that opens, fill in all required parameters:
- Name
- Purchase price
- Sale price
- Category (choose from existing ones)
- Unit of measurement
- Volume unit
- Gross weight
- Calories
- Description
- Attach a photo (if available)
-
Click “Create item”.
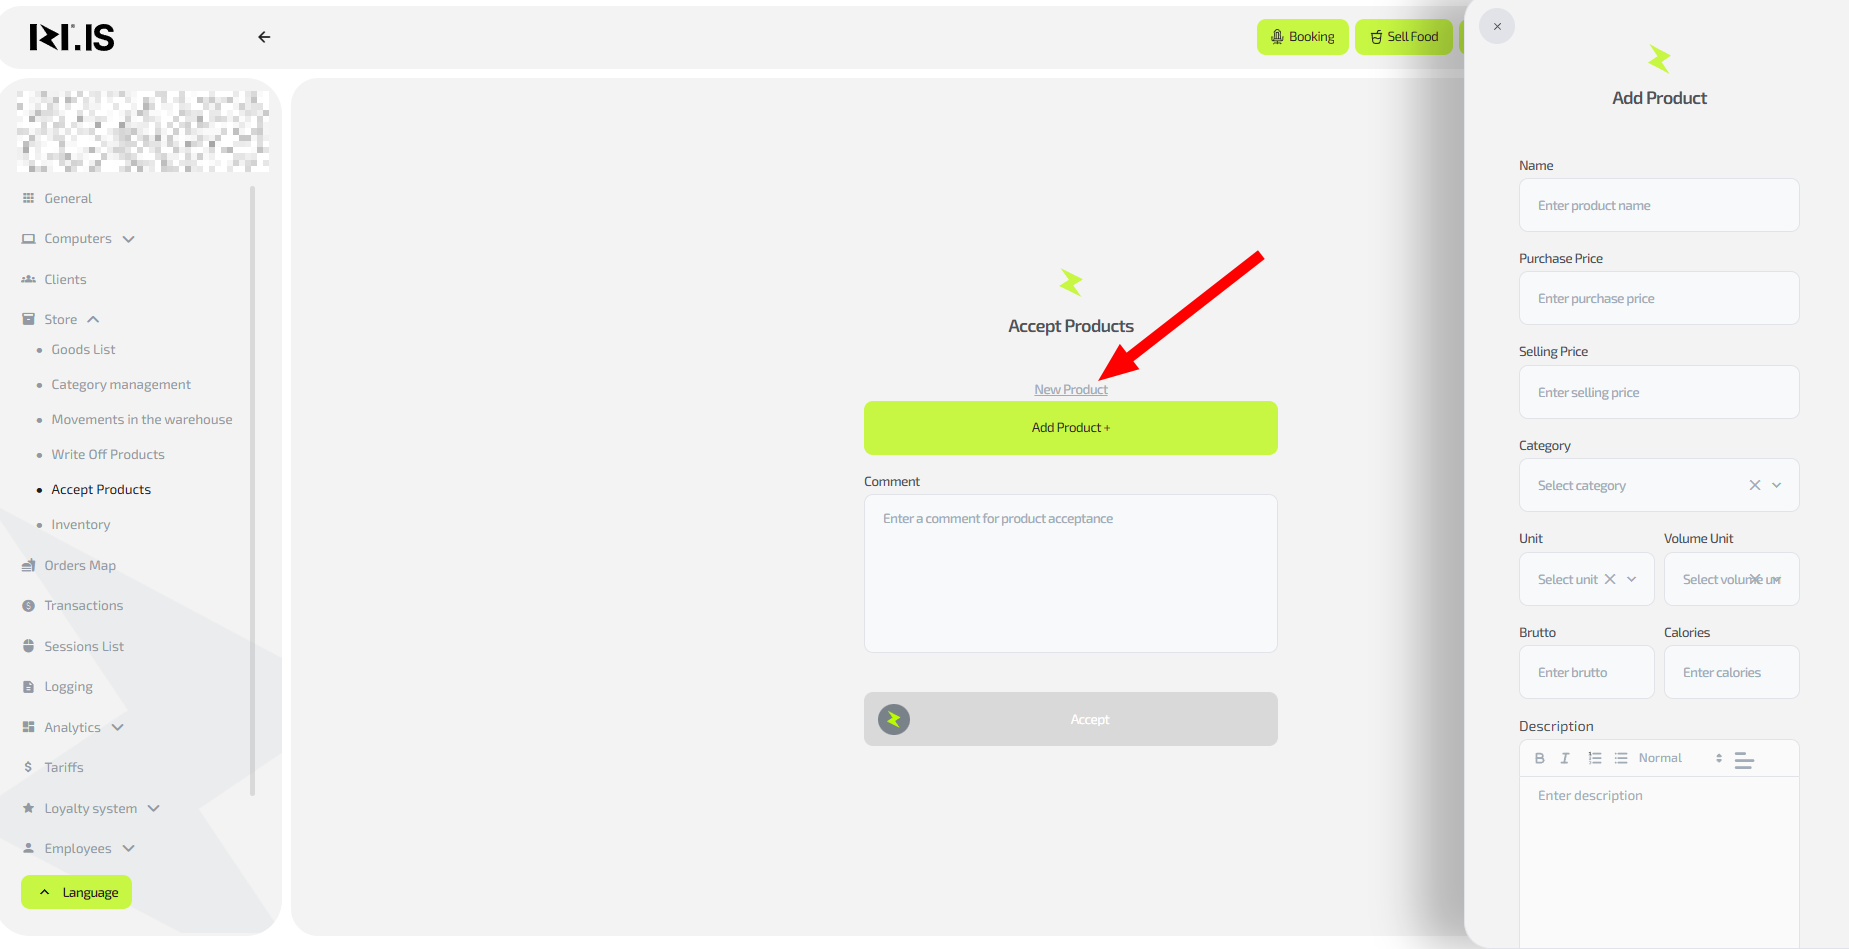
Important: Fill in all fields — otherwise the item may work incorrectly (for example, not appear in sales or cause calculation errors).
After creation, go back to Step 2 and receive the new item as an existing one.
Common situations
| Problem | What to do |
|---|---|
| Item not found in the list | Create a new item as described in Step 3 or check filters by category. |
| Categories are not displayed | Create them in the “Items list” subsection and refresh the “Receiving items” section. |
| Photo is not attached | Check the file format (JPEG/PNG) and size; try without a photo if it is not critical. |