Cash register integration
Article goal
Show how to connect and configure the cash register and payment terminal in IZI CRM, explain integration scenarios, and describe the purpose of the cash register and its role in the club’s financial operations.
Who this article is for
- Club owners
- Administrators with extended rights
- Club IT specialists
- Staff responsible for fiscal operations
What you will learn
- Which cash register integration options are supported by IZI CRM
- Which settings are available in the “Cash register integration” section
- What role the cash register and terminal play in IZI CRM
- How to configure the cash register and terminal step by step
- How to work in emergency mode when the cash register fails
Prerequisites
Before you start, make sure that:
-
The cash register and payment terminal are connected and configured on the administrator’s PC.
Configuration is performed by:- the company that connects the KKT (fiscal register),
- or the club’s IT specialist.
-
The following are installed and nconfigured on the PC:
- KKM-Server, with the cash register and payment terminal added to it
- KKM-Server browser extension
These operations are performed by IZI support when connecting the club to the system.
What the cash register is used for in IZI CRM
The cash register is one of the key elements of IZI CRM, ensuring legally correct accounting of all financial operations in the club.
The cash register is used for:
- Fiscalization of sales (sessions, bar, balance top-ups)
- Automatic receipt printing upon payment
- Processing card payments via the terminal
- Shift reporting:
- printing the shift opening report
- reconciling data when closing the shift
- Working with “Chestny Znak” marking, if used
Without a cash register, CRM works in a “non-fiscal” mode:
- Operations are processed in the system,
- but are NOT sent to the fiscal data operator (OFD).
IZI CRM + cash register working scenarios
IZI CRM supports several working modes:
1. Automatic work via cash register and payment terminal
Full integration:
- cash register → prints receipts, sends data to OFD
- payment terminal → card payment through CRM without manual input
This is the ideal and recommended option.
2. Automatic work with cash register only (terminal not connected)
- The cash register works fully
- The administrator processes card payments manually on a separate terminal
- Then records the operation in CRM
3. Work with cash register integration disabled
CRM continues to process transactions, but bypassing the cash register:
- Receipts are NOT printed
- Operations are NOT sent to OFD
Used when:
- there is no cash register
- or the club uses its own fiscalization mechanism, for example an Evotor cash register
4. Printing receipts via a regular receipt printer (non-fiscal)
CRM prints non-fiscal receipts.
Transactions are sent to OFD by external club tools.
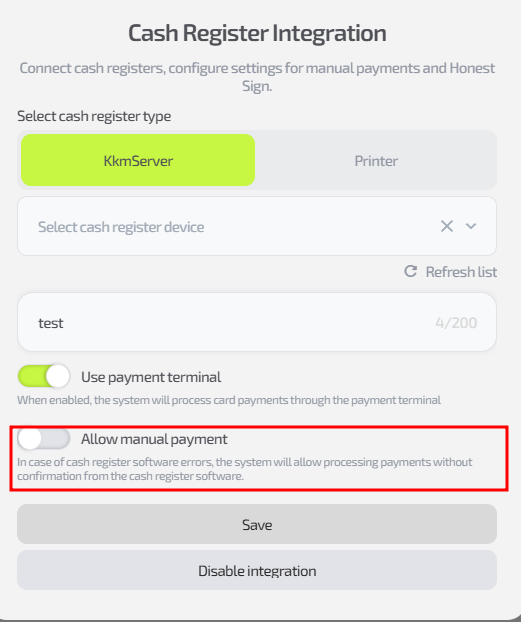
Options in the “Cash register integration” section
In this window you can:
-
Select cash register type – KkmServer or Printer
-
Select a cash register device from the dropdown list
-
Specify the cashier’s name that will appear on the fiscal receipt
-
Connect the payment terminal
-
Enable emergency mode “Manual payment”, which allows processing sales without a response from the cash register (in case of temporary failures)
-
Save settings or disable integration:
- “Save” — applies the configuration
- “Disable integration” — completely disables CRM interaction with the cash register
Step-by-step guide to configuring the cash register
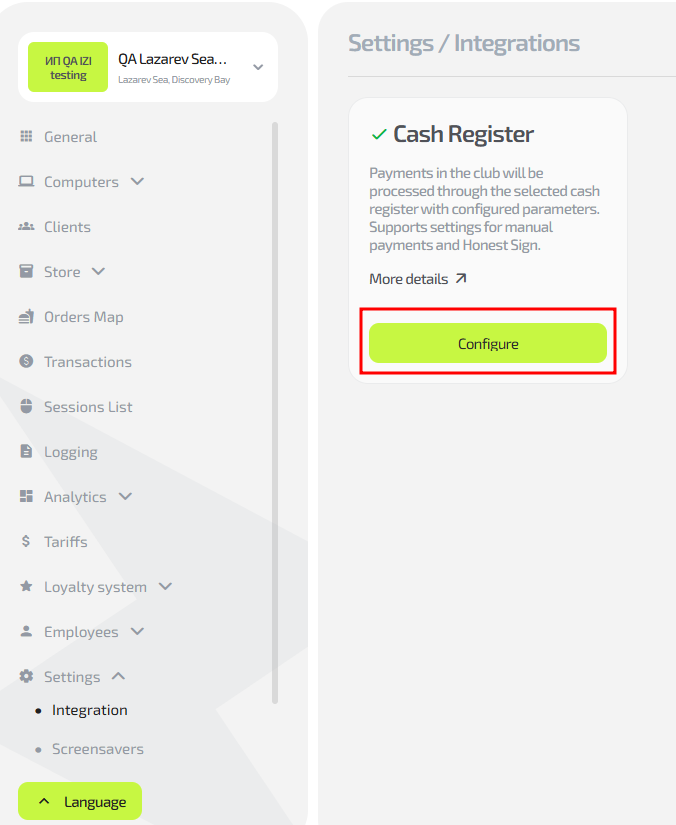
Step 1. Go to the “Settings” section
- Log in to IZI CRM.
- In the left menu click “Settings” and select “Integrations” from the dropdown.

Step 2. Open the cash register integration window
- Find the “Integrations” block
- Click “Configure”
Step 3. Select the cash register
- In the new window, in the “Cash register type” field select:
- KkmServer,
- or Printer
- In the dropdown list select the cash register device
- If needed, click “Refresh list” if the cash register was connected recently
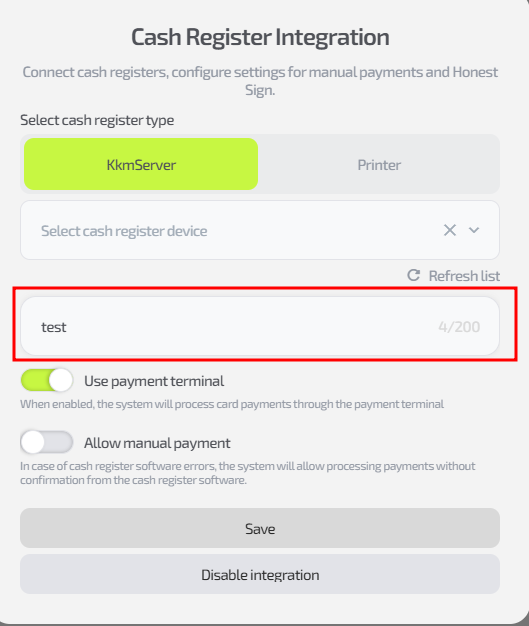
Step 4. Specify the cashier’s name
If the field is empty, the receipt will show the name of the administrator who opened the shift.
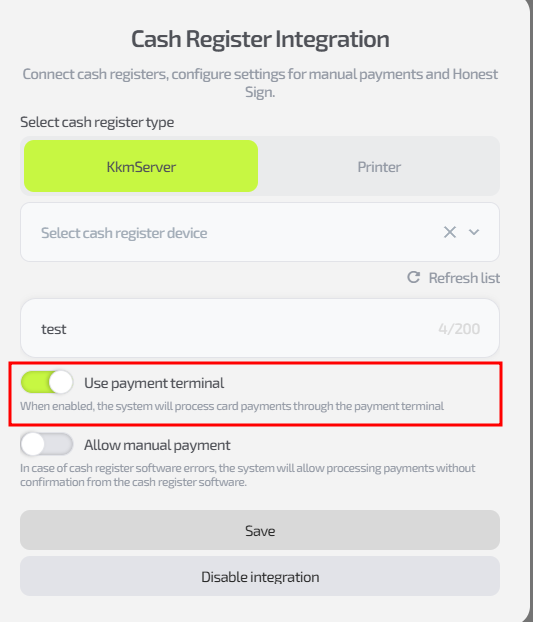
Step 5. Configure interaction with the payment terminal
- If the terminal is connected to the administrator’s PC, enable “Use payment terminal”.
Step 6. Configure emergency mode
- If the cash register temporarily does not respond, enable “Allow manual payment”
- In this mode you can continue processing sales
Important: refunds require a working cash register and terminal.
Step 7. Save settings
Click “Save” to apply the changes.
Useful tips
- Enable “Manual payment” only for the duration of a cash register failure
- After the issue is resolved, be sure to disable it
- If the cash register or terminal is not displayed in the list, restart KKM-Server
- Any technical issues can be resolved via IZI support (see article 1.8)